Summer Delights
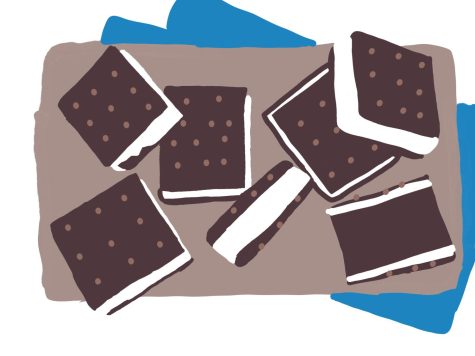
It’s almost summer! It’s time for some good old cold treats. They are scrumptious and everyone’s favorite. Ice cream sandwiches and homemade popsicles that you can make from home whenever you feel like it during this summer time. Here are the following things you need to make these classics.

Prep Time: 35 Minutes
Bake Time: 45 Minutes
*Leave Overnight 14 Hours
Total Time: 15 Hours & 15 Minutes
INGREDIENTS:
Vanilla Ice cream:
- 2 cups (454g) milk, whole preferred
- 1/3 cup (67g) granulated sugar
- 2 tablespoons (43g) golden syrup or agave syrup*
- 2 tablespoons (14g) tapioca starch*
- 1/4 teaspoon kosher salt*
- 1 cup (227g) heavy cream
- 1/2 teaspoon King Arthur Pure Vanilla Extract
Chocolate Cookie Bar:
- 1 1/4 cups (150g) King Arthur Unbleached All-Purpose Flour
- 1/2 cup (43g) Dutch-process cocoa or King Arthur Triple Cocoa Blend
- 1/2 teaspoon baking soda
- 1/2 teaspoon kosher salt or 3/8 teaspoon salt
- 6 tablespoons (85g) unsalted butter, softened
- 1/2 cup (99g) granulated sugar
- 1/4 cup (53g) light brown sugar, packed
- 1 teaspoon vanilla extract
- 2/3 cup (152g) milk, whole preferred
INSTRUCTIONS:
- To make the ice cream: Whisk together 1/2 cup (113g) of the milk, the sugar, syrup, tapioca starch, and salt in a saucepan. Stir in the remaining milk, and the cream.
- Cook and stir the mixture over medium-high heat until bubbles form around the edge and it begins to steam. Simmer for 3 to 5 minutes, stirring constantly, until the mixture thickens to the consistency of a cream sauce; don’t let it boil.
- Remove the mixture from the heat, stir in the vanilla, and chill thoroughly in the refrigerator. For best results, the mixture should be very cold. Make it ahead and refrigerate overnight or for up to a couple of days, if desired. When the mixture is thoroughly chilled, freeze it in your ice cream maker, following the manufacturer’s directions.
- As soon as it comes out of the ice cream maker, if using. Transfer the ice cream to a storage container, and freeze until solid; it’ll still be soft enough to scoop easily. Store in your refrigerator’s freezer until you’re ready to make the sandwiches.
- Preheat the oven to 350°F, with a rack in the center. Lightly grease a piece of parchment about 12″ x 16″, and place it on a flat work surface.
- To make the cookies: Whisk together the flour, cocoa, baking soda, and salt; set aside.
- In a separate bowl, beat together the butter, sugars, and vanilla at high speed until well combined and somewhat expanded; the mixture will look a bit grainy, but also fairly creamy.
- On low speed, add half the dry ingredients; then the milk; then the remaining dry ingredients, scraping the bowl between additions.
- Dollop the batter all over the prepared parchment paper. Use a spatula to spread it to the edges of the parchment, smoothing it as flat as possible. Pick the parchment up, and set it into a half-sheet pan (18″ x 13″), or onto a large cookie sheet.
- Bake the cookie slab for about 10 minutes, until it just loses its shine. Remove the pan from the oven, and cool the cookie on the pan for about 5 minutes. Cut it in half crosswise to make two rectangles, each about 8″ x 12″. Trim the edges of each rectangle, if desired; you’ll make neater-looking sandwiches.
- Use a fork to prick the top of the cookie slabs in neat rows, like the top of a traditional ice cream sandwich. Place the cookie slabs, with their parchment, on a rack or racks to cool completely. When completely cool, wrap well and place in the freezer. If there’s room, freeze them on a baking sheet; it’s good to have a cold surface to work on when you’re making the sandwiches.
- To assemble the ice cream sandwiches: If the ice cream you’ve made is really hard, remove it from the freezer and allow it to soften at room temperature for 15 to 30 minutes before assembling. Once the ice cream is firm but spreadable, peel the parchment off the backs of the cookie slabs. Place one slab, bottom up, on a cold surface. Spread with ice cream. Top with the second cookie slab, top side up. Press down firmly to distribute the ice cream evenly between the cookie slabs.
- Use a sharp knife to trim the edges of the sandwiches, if necessary or desired. If the ice cream has started to melt, place the pan back in the freezer to firm it up. Once it’s firm, cut the slab into 12 squares.
- Serve immediately; or wrap squares individually in plastic wrap, and store in the freezer.
Homemade Popsicles

Prep Time: 10 minutes
Cool Time: 4 hours
Total Time 4 hours & 10 minutes
Ingredients:
Berry Lemon
▢ ½ cup orange juice
▢ 1 ½ cup fresh berries
▢ 2 Tbsp lemon juice
▢ 1 Tbsp lemon zest
▢ 2 to 4 Tbsp honey or sugar
Rainbow Fruit
▢ 1 cup sliced fruit
▢ 1 ½ cups coconut water
▢ 2 to 4 Tbsp honey or sugar
Berries and Cream
▢ 1 ½ cups fresh berries
▢ 2 Tbsp honey or sugar
▢ 1 cup full-fat plain Greek yogurt
▢ ½ tsp vanilla extract
Coconut Lime
▢ 1 14-oz can full-fat coconut milk
▢ ¼ cup lime juice
▢ 2 Tbsp lime zest
▢ ¼ cup honey
Sneaky Spinach
▢ 1 ½ cups milk
▢ 1 cup fresh spinach
▢ ¼ cup honey
▢ 2 bananas
Instructions
- Mix: Mix your ingredients and pour into molds according to the popsicle you want to make:
- Berry Lemon: Combine all ingredients in a blender until smooth. Pour into molds.
- Rainbow Fruit: Distribute fruit into molds. Combine coconut water and honey, then pour into molds, tapping on the counter to remove air pockets.
- Berries and Cream: Puree berries until smooth (add a touch of water or juice if needed to get things moving). Stir together yogurt, honey, and vanilla. Spoon berries and yogurt into molds in alternating layers.
- Coconut Lime: Stir together all ingredients. Pour into molds.
- Sneaky Spinach: Combine all ingredients in a blender until smooth. Pour into molds.
- Freeze: Insert popsicle sticks and freeze until hard, at least 4 hours.
- Unmold: Run mold under warm water for a few seconds to loosen, then remove pops from the molds.
There you have it, now you have the perfect treats for this summer! You can make them whenever you want. Make it multiple times and still stay cool during these hot days. Choose these different flavors of popsicles or you can experiment with and make a new flavor. This recipe was from the King Arthur baking food and liveatlearn website.
Your donation will support the student journalists of San Marcos High School. Your contribution will allow us to purchase equipment and cover our annual website hosting costs.

Sofia is a senior attending San Marcos High School this is her second year in journalism. Her favorite subjects in school are english and history. What...


